Showing posts with label dessert. Show all posts

Tuesday, March 5, 2013

Lemon Graham Squares

I spend every Tuesday evening meeting with the youth group in our church.  It keeps me really busy but has turned into the highlight of my week.  I know teenagers sometimes get a bad wrap, but our kids are awesome!  So driven, so bright and energetic, and so kind to each other.  No Mean Girls in this crowd.  Their great vibes are so infectious, I always leave feeling younger and fortunate to be around such great young people.
 Regardless of what we might be doing that night, (service project, building skills, working towards goals), food is almost always involved, and I am always happy to provide it.  It gives me a chance to experiment with delicious looking treats without actually having to have them in the house.  I found these lemon graham squares on Debbie's blog at the Friday Friends and instantly fell in love.  How can you not love a tart lemon filling between two layers of cookie crumbs?  I made them once for our church group, and then a new batch the very next day to hoard at home.  Yeah, so much for getting them out of the house!

Lemon Graham Squares
Found at The Friday Friends

Ingredients

1 can (14oz) sweetened condensed milk
1/2 cup lemon juice
1 1/2 cups graham cracker crumbs (exactly one plastic packed stack of graham crackers)
3/4  cup all-purpose flour
1/3 cup packed brown sugar
1/2 tsp baking powder
dash salt
1/2 cup melted butter

Directions

In a bowl, combine the milk and lemon juice, mix well, set aside. In another bowl, combine the cracker crumbs, flour, brown sugar, baking powder and salt. Stir in butter until crumbly.

Press half of the crumb mixture into a greased 9-inch square baking dish.  Pour lemon mixture over crust; sprinkle with remaining crumbs.   Bake at  375F for  20-25 minutes or until lightly browned. 

Cool in pan on a wire rack.

Cut into bars.

Shared with Taste and Tell Thursdays

Monday, February 18, 2013

Banana Chocolate Chip Baked "Donut Holes"


One great memory I have of my childhood were all the homemade treats my mom made for us as kids.  There was nothing better than walking through the door to the scent of homemade cookies or a fresh batch of muffins.  Any troubles that may have happened at either school or work were immediately forgotten to the promise of a warm baked good in your belly.
Lately I've been trying to offer the same thing to my kids.  The cheers alone when I announce what will be coming out of the oven soon make it all worth it.  These mini banana muffins, or should I say "donut holes" were a particular hit.  I call them donut holes because the original recipe is actually of a baked donut, but since I don't have the right pan for that, this is what we did instead.  Since it's meant to be a baked donut, they are a bit denser and chewier than a traditional cakey muffin.  They are also a snap to make, and use Greek yogurt, adding more protein and less fat.

Banana Chocolate Chip Baked "Donut Holes"
Adapted from Janie's Kitchen

Ingredients

1 cup Mashed Ripe Banana (Roughly 2 small bananas)
1/2 cup Sugar
1/2 cup Fat Free Greek Yogurt 
1/4 cup Unsalted Butter (Melted)
2 Eggs (Room Temperature)
1 teaspoon Pure Vanilla Extract
2 cups White Flour
1 teaspoon Baking Powder
1/2 teaspoon Baking Soda
1/4 teaspoon Salt
1 cup Mini Chocolate Chips


Topping (If Desired)
1/4 Cup Sugar
1 Tb Cinnamon

Directions

Preheat the oven to 325.

Using the electric mixer with whisk attachment, add mashed banana, sugar and Greek yogurt.  Mix until incorporated.

Add melted butter, eggs, and vanilla extract, and mix.

Add flour, baking powder, baking soda and salt to the batter and mix until just incorporated.  Do not overmix.

Using a spatula, fold in chocolate chips.  With a spoon, scoop batter into sprayed mini muffin cups.  Fill until 3/4 full.

Either sprinkle cinnamon sugar on before baking, or dip in melted butter and dip in cinnamon sugar AFTER baking.  I did the first to save on calories, although I have no doubt that the latter choice is amazing.

Bake 12-15 minutes, until mini muffin is slightly springy and golden brown.


Monday, February 4, 2013

Lemon Blossoms

 I've never considered myself much of a girly girl.  My hair and makeup rarely takes longer than twenty minutes, I say 'dude' way more than I should, and I consider having to wear skirts and high heels some kind of medieval torture.

But, that doesn't mean that I don't like to be pampered, and if I have the funds, you best believe that I'd be getting myself massaged, facialed, and manicured on a regular basis.  So, when I found out that the youth in our church wanted to throw a spa party, I was on. board.

To my absolute delight, I was assigned to bring spa treats.  Where do I even begin?  I wanted something sweet, and dainty, and bite sized.  The perfect treat for primping.  Lemon blossoms?  No brainer.
 How can you not love a bite sized morsel of sunshine?  These take no time at all to make, are cute as heck, and taste so sweet and bright that you might actually see cartoon birds tweeting at your window.  Make them and enjoy dude!

Lemon Blossoms
By Paula Deen

Ingredients

1 (18.25 oz. box) yellow cake mix
1 (3.4 oz.) instant lemon flavored pudding mix
4 large eggs
3/4 cup plus 3 tablespoons vegetable oil, divided
4 cups confectioners' sugar
1 tablespoon lemon zest (about 1 lemon)
1/3 cup fresh lemon juice
3 tablespoons water
 
Directions

Preheat oven to 350 degrees. Spray miniature muffin pans with nonstick cooking spray. In a large bowl, combine cake mix, pudding mix, eggs, and 3/4 cup oil. Beat for 2 minutes. Spoon 1 tablespoon of the batter into each muffin tin, and bake for 12 minutes. Turn the cakes onto a cloth towel.

In a medium bowl, sift confectioners' sugar. Add lemon zest, lemon juice, remaining 3 tablespoons oil, and water, stirring until smooth. Dip the cakes into the glaze while they are still warm, covering as much of the cake as possible. Place the cakes on a wire rack with wax paper underneath to catch the drips. Let the glaze set thoroughly before storing in an airtight container.
 

Wednesday, October 3, 2012

Lemon Crinkle Cookies

 While I am fully embracing the onset of fall, I completely understand if you're not.  In fact, to help ease you into it, I thought I'd send one more summer treat before the apple/pumpkin/winter squash frenzy is in full force.
 Am I the only one that things of summer when I think of lemon?  Is lemon even considered a seasonal summer fruit?  It's just so bright, fresh, and yellow like the sun.  These are the kind of cookies I want to pack on a picnic where there are going to be volleyball games and watermelon seed spitting contests.
I found these tender and tangy gems at Pam's fabulous blog.  If you haven't been by her site, you're seriously missing out.  I pin just about everything she posts.

Lemon Crinkle Cookies
For the Love of Cooking

Ingredients

1/2 cup of unsalted butter, softened
1 cup of white sugar
1 tsp vanilla extract
1 egg
3 tbsp fresh lemon juice
1 tbsp fresh lemon zest
1 1/2 cups of flour
1/4 tsp salt
1/4 tsp baking powder
1/8 tsp baking soda
1/2 cup of powdered sugar

Directions

Preheat the oven to 350 degrees. Line a baking sheet with a silpat mat.

In a large bowl, beat the butter and sugar together with a mixer until creamy. Add the vanilla, egg, lemon juice, and lemon zest and beat until smooth and well mixed. Combine the flour, salt, baking powder, and baking soda together until well combined. Slowly add the flour mixture to the lemon mixture until mixed. The dough will be very sticky. Place into the refrigerator for 10-15 minutes or until firm enough to roll into balls.

Roll the dough into small balls then toss in the bowl of powdered sugar until evenly coated. Place the balls on the baking sheet about 2 inches apart. Place into the oven and bake for 9-11 minutes.
Remove the cookies from the oven and let them cool on a wire rack for at least 7 minutes to set.

Serve the cookies immediately

Tuesday, November 22, 2011

Krispy Kreme Donuts


Happy Thanksgiving! Or Kanksgizzin, as my silly kids like to call it. What are your plans for this wonderful holiday? Going to snuggle in at home, travel to see family, or maybe going out for Thanksgiving? Whatever you do, I hope it's wonderful!

I feel a bit hypocritical posting a recipe for fried donuts, after plastering my Livefit launch all over my blog. However, in my defense, these were made long before we started, and c'mon, its time to indulge a bit right? As I've mentioned a few times, my husband and I have very different tastes. While I'm usually in the mood for something savory and salty (cheeseburgers, pizza, chips, etc), my husband has a MAJOR sweet-tooth. He could eat cookies and cheesecake for every meal, if allowed, and would wake up the next morning feeling great. Needless to say, this program that we've been doing has posed some pretty serious cravings for my "sweets loving" husband, but he's been staying strong, bless him.

These donuts were something he made a few months ago. He loves Krispy Kreme, and since we don't have one readily available to us, he found the recipe and whipped them up himself. Not even being a fan of donuts, I do have to say, these were pretty fantastic. If you're only interested in having one or two, I suggest halving the recipe, because it's really hard to stop!


Krispy Kreme Donuts
Food.com

Ingredients

Donuts
2 cups scalded milk
1/2 cup butter
2/3 cup sugar, divided
1 teaspoon salt
2 tablespoons yeast
4 eggs ( beaten)
1/4 teaspoon nutmeg
7 cups sifted flour

Glaze
3 cups powdered sugar
1/2 teaspoon salt
1/2 teaspoon vanilla
1/2 cup cold water

Directions

1. Mix together ingredients for glaze.
2. Melt butter in hot milk, add 1 tsp sugar and salt. Allow to cool.
3. Beat in yeast, nutmeg, eggs, remaining sugar, and 3 cups flour.
4. Add rest of flour (dough will be sticky).
5. Knead for 5 minutes then allow to rise for 1-1 1/2 hours.
6. Roll out dough, cut into shapes.
7. Do not re-roll dough, then allow to rise for 30-45 minutes.
8. Heat oil to 365� and fry 1 - 2 minutes on each side or until brown. Toss in the doughnut holes first, let those cook, and then proceed to cooking the donuts.

Enjoy!

Happy Thanksgiving everyone! I happen to be very grateful to all of you for your friendship and support. Have a safe and delicious weekend!

Friday, September 9, 2011

Berries and Chocolate


Growing up with my parents meant learning how to say thank you. You say thank you when someone passes you the broccoli at the table, you send a thank you card when given a gift, and when someone goes out of their way to really do something nice, you say thank you in style, like this platter of berries and chocolate.


My mom really wanted to say thank you to a local dental office after they went above and beyond to beautify her smile. We put our heads together and decided on a platter of fruit and chocolate. Costco had a gorgeous selection of Rainier cherries, strawberries and blackberries, so we went with those. We then set to work making Funfetti cakeballs, raspberry cheesecake bites, and Ghiradhelli brownie bites (from the boxed mix).

It turned out to be a really fun platter to deliver, and it was definitely a crowd pleaser. You could do something like this for a shower, a party, or a fun way to surprise a loved one. And of course, it's a wonderful way to say thank you!

Friday, August 19, 2011

Watermelon Cake Balls


I know a lot of you food bloggers are already doing this, but you've got to check out pinterest.com. It's a really fun website full of ideas, and ways to file and bookmark your ideas for others to see. I've found a ton of great ideas, including these little babies.


I so wish I could have gotten a better picture of these, but when you're away from home and out of your element it doesn't always work out. The kids and I made these cake balls and they were as delicious as they were cute. I needed to hurry and post these because it's not too late, there's still two weeks left of summer, right? :)


Watermelon Cake Balls


Ingredients


1 strawberry cake mix, prepared according to directions

1 tub strawberry frosting, or vanilla frosting, colored red

1-1 1/2 chocolate chips

1 bag white almond bark

1 bad green chocolate melts (I like Wilton the best) or white chocolate colored green (be sure to add coloring BEFORE you melt it, otherwise the chocolate will seize)


Directions


Crumble cake mix into a large bowl. Add entire tub of frosting and chocolate chips, mix until completely combined. Roll into balls the size of a bouncy ball. Freeze for at least a half hour. Lay out a long sheet of wax paper on the counter. Melt your white chocolate (I usually melt the chocolate a third of the bag at a time). Using a spoon, completely dip the cake ball in chocolate, tapping off excess. Dry on wax paper. Repeat the same steps with green chocolate. Allow to dry and eat, after everyone admires the cuteness of course. :)


Monday, June 6, 2011

Lemon Blueberry Buttermilk Cookies


As I've mentioned in the past, my husband is a dental student out here in Philly. Because of this, virtually all of our friends are students as well, all of us away from family, and most of us experiencing the east coast for the first time. It's really nice because we can all sympathize with each other when we get homesick, or when we're feeling exceptionally poor that day. We all rely on each other for babysitting, support, or even just a shoulder to cry on. For four years, they ARE your family and we become very close.


The hard part about having student friends is that every year you have to say goodbye to a fraction of them who are lucky enough to be graduating and moving on. It's always sad, but it's also so exciting for them to reach that next step. About a month ago we had a big bbq for the families leaving. It was a lot of fun and a good chance to give hugs and well wishes. Everyone contributes to the potluck and there is always lots of good food.


These were my contribution, I found these cookies on Maria's blog Two Peas and Their Pod. I love Maria's blog, her food is so beautiful and fresh and there is NO shortage of cookie recipes, this girl can bake! These were bright and delicious, and my favorite part was biting into a juicy blueberry. They're perfect for summer and the recipe can be found here. Thanks Maria!

Tuesday, May 31, 2011

Thick and Chewy Triple Chocolate Cookies


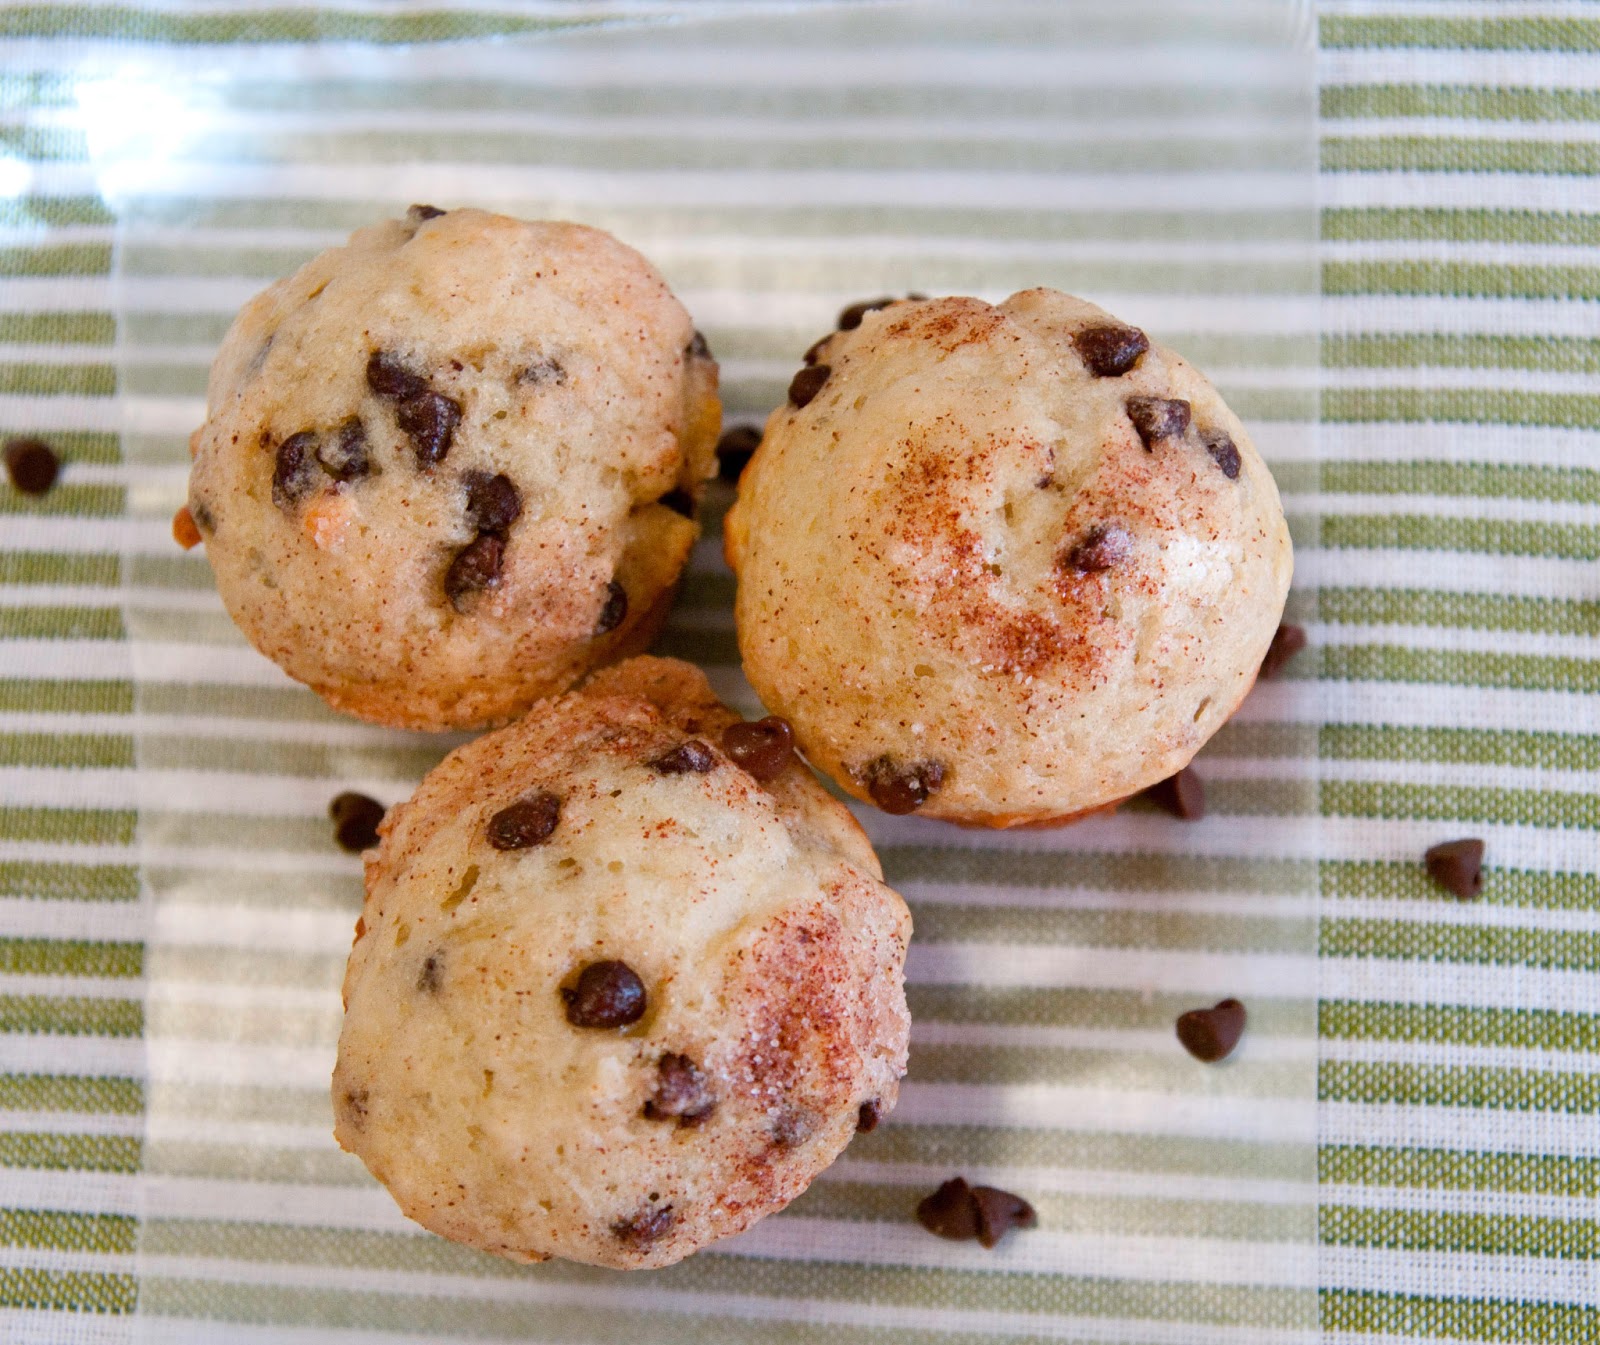
How did you all enjoy the long weekend? I love Memorial Day weekend. Not only does it give us an opportunity to think of those that have fought for our country, but it also feels like the perfect kickoff to summer! My little boy turned four yesterday, which gave us even more of a reason to celebrate with lots of food, friends, and WATER! Our winter-white skin is paying the price now, but it was so worth it.

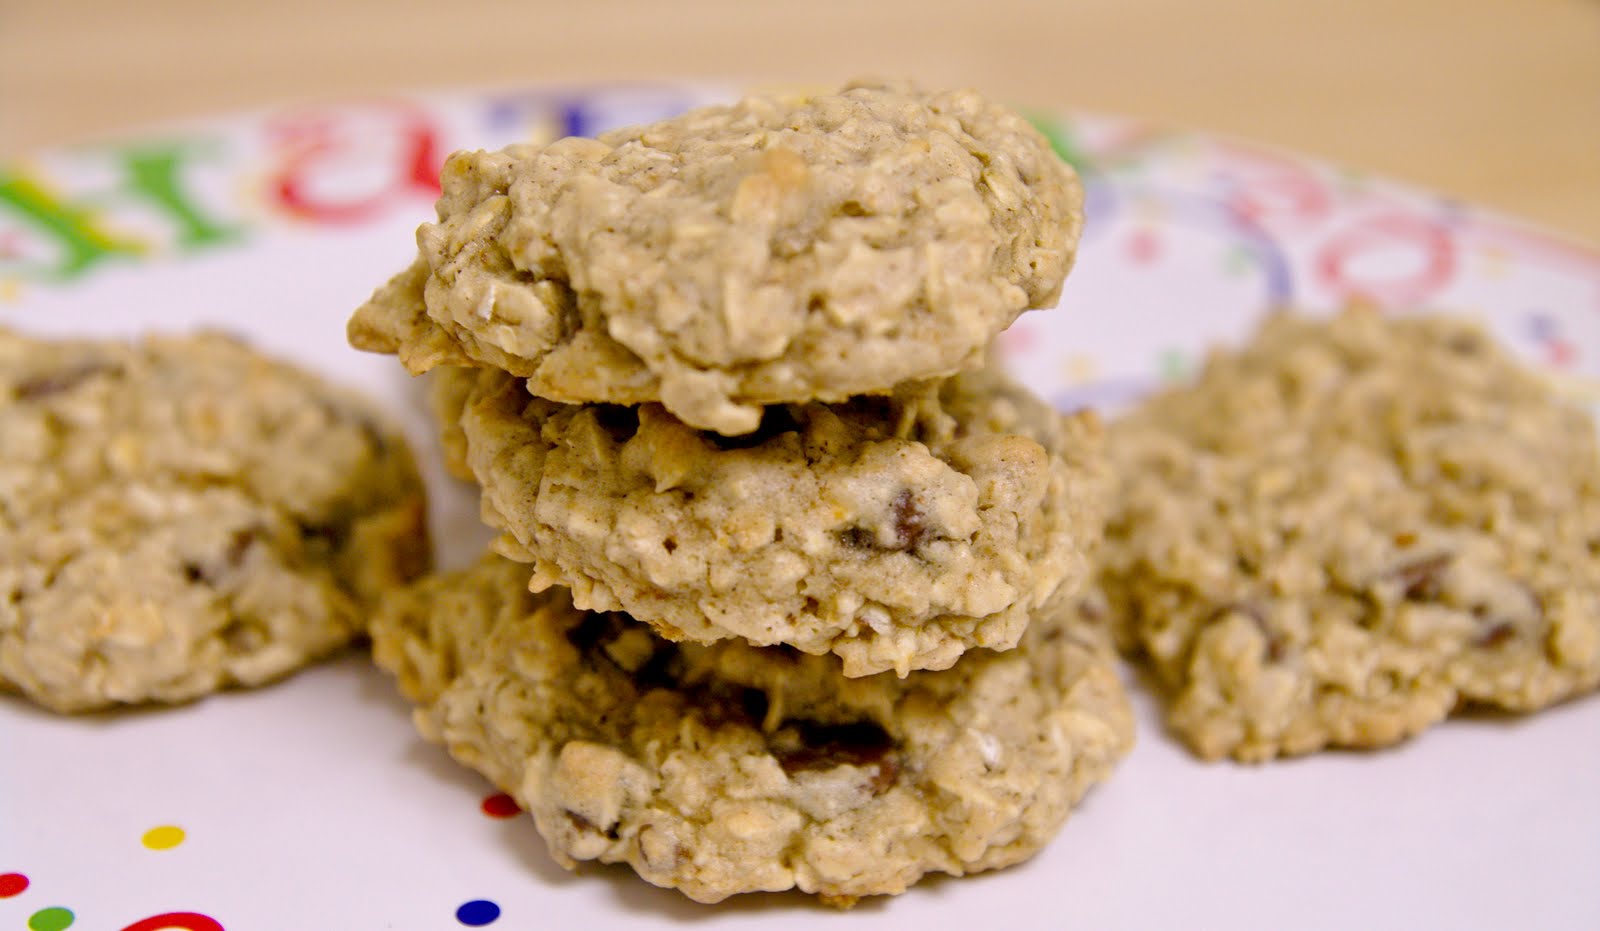
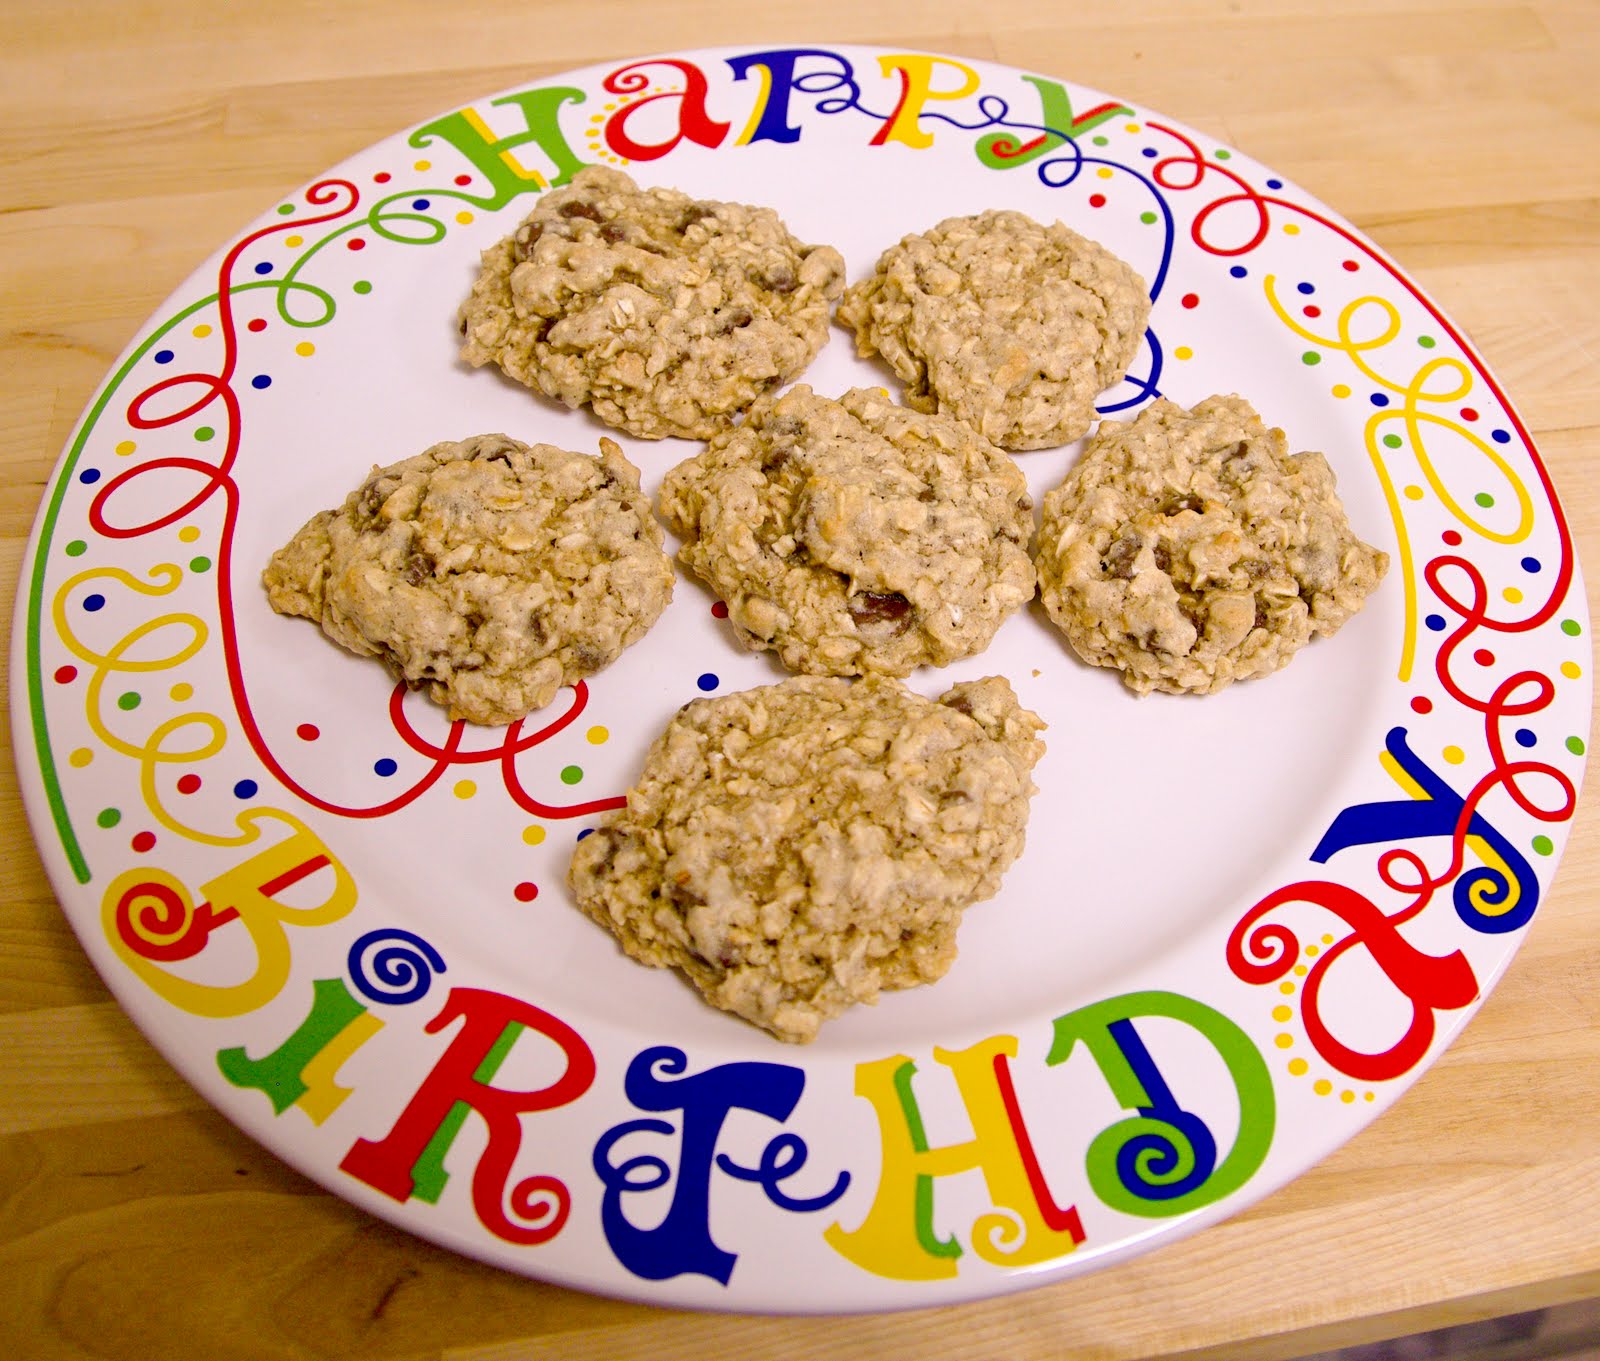
These cookies were actually made by my husband, who, I've decided, probably needs more recognition on my blog then I give him. We make a good pair, I love to cook, and he loves to bake. It's a hobby I didn't expect him to have, but we haven't had to buy bread in almost a year, so I'm not complaining! The fun thing about having a husband who bakes is that he doesn't get scared easily, he's attacked some pretty involved recipes that I wouldn't dare try.

The funny things about these cookies is that my chocolate loving husband didn't even care for them. But I, who doesn't crave chocolate often, loved them! I thought they were rich, chewy and delicious. I had a really hard time stopping at one. It's probably a good thing that I'm not a huge baker, otherwise these would be in stock at all times!

Thick and Chewy Triple Chocolate Cookies
America's Test Kitchen Baking Book

Ingredients

2 cups all-purpose flour
1/2 cup cocoa powder
2 teaspoons baking powder
3/4 teaspoons salt
4 large eggs
2 teaspoons vanilla extract
2 teaspoons instant coffee (I omitted this)
10 tablespoons unsalted butter, softened
1 1/2 cups packed light brown sugar
16 oz semisweet chocolate, melted and cooled
2 cups semisweet chocolate chips

Directions

1. Adjust the oven racks to the upper-middle and lower-middle positions and heat the oven to 350 degrees. Line 2 large baking sheets with parchment paper. Whisk the flour, cocoa, baking powder and salt together in a medium bowl In a small bowl, whisk the eggs, vanilla, and coffee together until the coffee is dissolved.

2. In a large bowl, beat the butter and sugars together with an electric mixer on medium speed until light and fluffy, 3 to 6 minutes, scraping down the bowl and beaters as needed. Beat in the egg mixture until incorporated, about 30 seconds. Beat in the melted chocolate, about 30 seconds.

3. Reduce the mixer speed to low and slowly add the flour mixture until combined, about 30 seconds. Stir in the chips until incorporated. Cover the bowl of dough with plastic wrap and let stand at room temp until the consistency is scoopable and fudge-like, about 30 minutes.

4. Working with 3 tablespoons of dough at a time, roll the dough into balls and lay them on the prepared baking sheets, spaced about 2 inches apart. Bake the cookies until the edges are set and beginning to brown but the centers are still soft and puffy, 10 to 12 minutes, switching and rotating the baking sheets halfway through baking. (The cookies will look raw between the cracks and seem underdone.)

5. Let the cookies cool on the baking sheet for 10 minutes, then serve warm or transfer to a wire rack and let cool completely. Repeat with the remaining dough using a cooled, freshly lined baking sheet.

Wednesday, April 27, 2011

Semi-Homemade Raspberry-Lemon Cheesecake Bites


Why do I love mini food so much? Is it because I'm mini? At 5'0, I rarely get to look others in the eye. Is it because I have mini kids? Or maybe mini food makes me feel better about eating ten? Regardless of what it is, the smaller food is, the happier it makes me.


This idea came after making those mini quiches. The little pie crusts were so easy to make that the possibilities became endless. Then I discovered that you can buy premade cheesecake filling that requires no baking.


That combined with a layer of lemon curd, and a bright raspberry, and you have one (or ten) tasty little bite!

Semi-Homemade Raspberry-Lemon Cheesecake Bite
A Blog About Food

Ingredients (Makes 48)

2 refrigerated rolled pie crusts
1 tub cheese cake filling
1 jar lemon curd
1 container of raspberries, washed (just about any berry would work)

Directions

Preheat oven to temperature on pie crust box. Unroll pie crust, flour on either size and roll out to almost twice it's size. Use a round glass or biscuit cutter to cut out circles to fit a greased mini muffin pan. Bake according to directions. (You'll do this twice). Allow to cool.

Fill each pie crust with cheesecake filling, a layer of lemon curd and top with one berry.

Thursday, March 31, 2011

False Alarm! Gonna Celebrate with Some Cookies!


If you could see me right now, I would look a bit like this!
,


Why? Because life went ahead and handed me a complete freebie today. When I woke up this morning, my beloved camera wasn't working, and the prognosis was not looking good. And my other equally beloved point-and-shoot camera (along with three months worth of pictures) was lost, hopelessly lost, trust me, I had called and looked EVERYWHERE. There was heartbreak, there were tears, and there may have also been irrational ebay bidding, along with ebay panic, and then utter ebay relief to find that i had been outbid at the last minute.

But then miracles happened, and not one, but BOTH of my cameras were restored to me by the end of the day. There was relief, there were more tears (so I love my cameras okay), and then there were cookies. How else does a foodie celebrate if not with food? Thank you all for your sweet comments at my post below, but I can't even tell you how happy I am to not have to take a break after all!


I found these gems at Gina's Skinny Taste, a wonderful blog with light recipes, especially conducive to those doing Weight Watchers. Now I'm all about cooking and eating healthy, but when it comes to dessert, I'm a purist. I don't think dessert should be messed with, just eat the dang brownie! But if you were to serve me these cookies without ever mentioning that they were light, I don't think I'd ever know. They're chewy, they're sweet, they are loaded with chocolate and my whole family LOVED them! Like a good girl, I had two, but I could have eaten these babies all night. Check out the recipe here!


Don't you love the plate? My parents sent it for my birthday a few days ago, I think I should be allowed to use it for at least a month, don't you? :)

Friday, February 11, 2011

Glazed Apple Fritters


I'm usually not very good at posting food items for specific holidays, simply because by the time I make it, the holiday is over and we've all moved on. However, I do have a lovely little treat for you for Valentine's Day. But I don't get the credit for this one.

A few Sundays ago we had friends over for a game night and desserts. Our friends brought the stuff for apple fritters and fried them up in our kitchen so we got them hot and fresh. Now, I'm really not a huge dessert girl. I'd much rather spend my calories on the savory foods like pizza, burgers and nachos, but OH. MY. GOSH. I could not stop eating these. They were sweet, perfectly oily, tender, but chunky...yeah, sorry I have to stop before the drool hits my keyboard. It took me a whole week to work these babies off, but it was worth every step on the treadmill, they were to die for!

Glazed Apple Fritters
By Cooks Country, made by Deborah, muah!

Ingredients

2 Granny Smith apples, peeled, cored and cut in 1/4-inch pieces
2 cups all purpose flour
1/3 cup granulated sugar
1 tablespoon baking powder
1 teaspoon salt
1 teaspoon ground cinnamon
1/4 teaspoon ground nutmeg
3/4 cup apple cider
2 large eggs, lightly beaten
2 tablespoons unsalted butter, melted
3 cups peanut or vegetable oil

Glaze:
2 cups confectioners' sugar
1/4 cup apple cider
1/2 teaspoon ground cinnamon
1/4 teaspoon ground nutmeg

Directions

1. Spread prepared apples in single layer on paper towel-lined baking sheet and pat thoroughly dry with paper towels. Combine flour, granulated sugar, baking powder, salt, cinnamon and nutmeg in large bowl. Whisk cider, eggs and melted butter in medium bowl until combined. Stir apples into flour mixture. Stir in cider mixture until incorporated.

2. Heat oil in Dutch oven over medium-high heat to 350 degrees. Following step 1, use 1/3-cup measure to transfer 5 heaping portions of batter to oil. Press batter lightly with back of spoon to flatten. Fry, adjusting burner as necessary to maintain oil temperature between 325 and 350 degrees, until deep golden brown, 2 to 3 minutes per side. Transfer fritters to wire rack set inside rimmed baking sheet. Bring oil back to 350 degrees and repeat with remaining batter. Let fritters cool 5 minutes.

3. Meanwhile, whisk confectioners' sugar, cider, cinnamon and nutmeg in medium bowl until smooth. Top each fritter with 1 heaping tablespoon glaze. Let glaze set 10 minutes. Serve.

Sunday, January 2, 2011

Creamy Hot Chocolate


I honestly don't know if anything is more rewarding then a cup of hot cocoa after a cold day outside. I remember deliberately playing in the snow as a kid, my cheeks and nose getting cold and rosy, knowing that it was all going to be topped off with a steamy, rich cup of hot chocolate.


I still love hot chocolate, but what I don't like is that powdery stuff trying to front as hot chocolate. Let's face it, you could shovel heaps of that sweetened dirt into your cup, it just doesn't cut it. I need the real thing.

My husband is actually the one that found this recipe. This is the real stuff folks, thick, creamy, chocolatey goodness that will make you feel like a kid again. You'll jump in a big pile of snow just to get a cup!


Creamy Hot Chocolate
Found on Allrecipes

Ingredients

1/3 cup unsweetened cocoa powder
3/4 cup white sugar
1 pinch salt
1/3 cup boiling water
3 1/2 cups milk
3/4 teaspoon vanilla extract
1/2 cup half-and-half cream

Directions

Combine the cocoa, sugar and pinch of salt in a saucepan. Blend in the boiling water. Bring this mixture to an easy boil while you stir. Simmer and stir for about 2 minutes. Watch that it doesn't scorch. Stir in 3 1/2 cups of milk and heat until very hot, but do not boil! Remove from heat and add vanilla. Divide between 4 mugs. Add the cream to the mugs of cocoa to cool it to drinking temperature.

Tuesday, December 28, 2010

A Very Bloggy Christmas

Initially I didn't plan to do this, I was just going to start fresh for the new year. But I just don't feel right about letting these wonderful treats go without giving credit and thanks to the bloggers who posted them.

I basically found all of my baking and treat ideas from the blogosphere this year, and while I didn't get to make near as many things as I would have liked, what I did make turned out ah-mazing! Here are some of the reasons my pants no longer fit :)


I absolutely could not go an entire Christmas season without making my all time favorite Christmas cookie, the Peanut Butter Blossom! So quick and easy, and when I say easy, I mean easy to stuff about ten down my throat at once! I know this recipe isn't much of a secret, but I always visit my aunts cookie blog, Sugarbliss for the recipe every year. Thanks Rebecca!


I found this sweet Holiday Chex Mix on Cooking with Cristine. Look at those adorable homemade Santa hats! So simply made by dipping bugles into red or cherry chocolate, and then into white for the trim. This was a pretty and delicious treat to pass out to friends. Thanks Cristine!


When I found these Creme-de-Menthe bars on Joanne's blog, Eats Well with Others, my oven was still broken and I could barely stand to wait to make this. Rich chocolatey brownies, with a creamy, minty, butter cream center, and a shell-like chocolate finish to this brownies from heaven, made for a very happy Teresa. No one else in my family is big into the mint-chocolate combo (crazies!) so I ate half the pan, and the other half is in the freezer just biding their time until I decide to cheat on my New Year's diet. Oh Joanne, how I love these bars!


And last, but certainly not least, Peppermint Thumbprint Cookie Cups from Barbara Bakes. Okay, so I did cheat a bit by just adding kisses instead of "thumbprinting" them, but I guarantee that either way you make them, you'll love them! Thanks so much Barbara!

And thanks to Blogland for providing us with SO many Christmas goodies, stories and heartfelt wishes. Even if I didn't make your treats, rest assured I imagined their smells and tastes and enjoyed a bit of the season with you! Enjoy the rest of your break and Happy New Year!